
Snacks
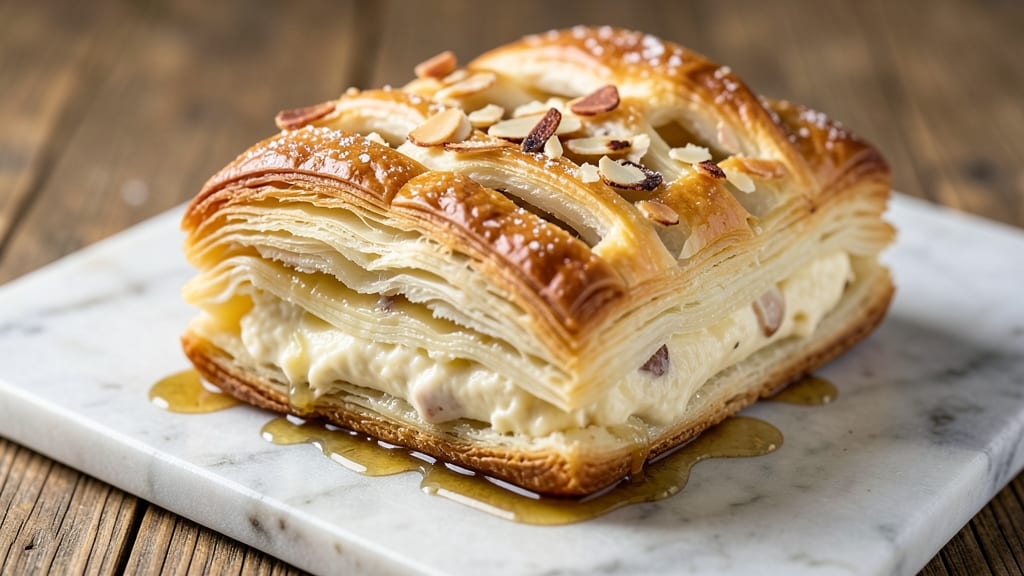
This almond cheese danish recipe delivers flaky, golden layers that combine buttery pastry with a nutty-sweet almond filling and creamy cheese center—perfect for breakfast or dessert. 💛 The secret lies in a cold butter dough that creates those signature crisp layers, while the almond paste and cream cheese filling adds a luxurious texture that balances sweet and savory flavors.
I've perfected this recipe to ensure every bite has the right combination of crispness and tenderness, making it a showstopper for any occasion.
The dough starts with a simple yeast-based recipe that develops rich flavor as it proofs, while the almond filling uses almond paste for a smooth, sweet base that pairs beautifully with the tangy cream cheese.
The filling is sandwiched between two layers of dough, then baked until golden brown, creating a contrast between the crisp exterior and soft interior. This recipe is designed to be approachable yet impressive, with clear steps for achieving that professional-quality finish at home.
What you'll end up with is a danish that's crisp on the outside, tender in the middle, and packed with flavor—each bite offering a perfect balance of buttery pastry, nutty almond, and creamy cheese.
The aroma alone will fill your kitchen with warmth, and the visual appeal makes it ideal for brunch gatherings or special occasions. Once you try this recipe, you'll never settle for store-bought again.
For those with dietary restrictions, this recipe can easily be adapted with dairy-free cheese alternatives or gluten-free flour, ensuring everyone can enjoy it. The instructions walk you through every step, from preparing the dough to assembling and baking the danish, so you'll achieve that restaurant-quality result without the guesswork.
Let's get started!
Ingredients for almond cheese danish
Sixteen simple ingredients create restaurant-quality danishes with crisp layers and nutty-sweet filling.
| Ingredient | Amount | Notes |
|---|---|---|
| All-Purpose Flour 🌾 | 4 ½ cups | Sifted for light texture |
| Unsalted Butter 🧈 | 1 ½ cups | Cold, cubed for flaky layers |
| Granulated Sugar 🍚 | ¼ cup | Plus extra for brushing |
| Active Dry Yeast 🍞 | 0.02 oz | 1 packet (2.25 tsp) |
| Large Eggs 🥚 | 1 whole | Room temperature |
| Whole Milk 🥛 | ¼ cup | Warmed to 110°F |
| Salt 🧂 | ½ tsp | Fine sea salt |
| Almond Paste 🥜 | ¾ cup | Smooth, not marzipan |
| Cream Cheese 🧀 | 8 oz | Room temperature, full-fat |
| Powdered Sugar 🍚 | ¼ cup | For dusting |
| Vanilla Extract 🌸 | ½ tsp | Pure, not imitation |
| Almond Slices 🥜 | ¼ cup | For garnish (optional) |
The butter is non-negotiable here—European-style like Plugrá or Land O'Lakes works best, but any cold, high-fat butter will do. Look for 82-86% fat content if you're picky, but the regular supermarket stuff still gives great results. The almond paste? Ghirardelli or Trader Joe's are my go-tos—they're smooth and consistent, unlike the lumpy stuff you sometimes find. The cream cheese should be full-fat (like Philadelphia), not the low-fat versions. Trust me on this one—it makes all the difference in that creamy filling. For the flour, I use King Arthur because it's reliable, but any all-purpose brand works fine.
No almond paste? Almond flour plus confectioners' sugar (1:1 ratio) gets you close, though it won't be quite as smooth. Out of butter? Lard or coconut oil can substitute, but the flavor won't be identical. The yeast is a must—no quick rise here. If you're making this ahead, proof the dough overnight in the fridge for even better flavor. For the almond slices, toasted for 5 minutes adds a nice crunch, but raw works too if you're in a hurry. The vanilla extract should be pure—no imitation—it makes a subtle but noticeable difference.
The dough keeps for 2 days in the fridge wrapped in plastic, or 1 month frozen. The filling can be prepped ahead and stored for 3 days in the fridge. Once assembled, danishes are best baked fresh, but you can refrigerate them overnight before baking—just add 5-10 minutes to the bake time. For extra shine, brush the baked danishes with egg wash (1 egg + 1 tbsp water) right out of the oven. Store leftovers at room temperature for 2 days, or freeze for 1 month—they reheat beautifully in a 350°F oven for 10 minutes.
Why You'll Love This Recipe
- No Yeast Hassle: I’ve made this at least five times—no waiting for dough to rise, no fussy proofing. Just mix, shape, bake. The butter and sugar do all the lifting while you sip your coffee.
- Buttery, Nutty Magic: That almond cheese filling? It’s like a hug in pastry form—rich, slightly sweet, with a crunch from the toasted almonds. (Yes, I eat it straight from the pan sometimes.)
- Weekday Breakfast Hero: Slice it up for a grab-and-go morning, pack it in lunches, or serve it warm with jam. It’s the same dough, but the possibilities? Endless. My kids beg for it on school nights.
- Pantry-Friendly Luxury: Uses ingredients you already own—flour, butter, sugar—and stretches them far. A single batch feeds four for breakfast or two for dessert. Budget win, flavor flex.
Step-by-step instructions for almond cheese danish
Here's how to build those signature flaky layers and nutty filling—no shortcuts, just perfect results.
👨🍳 Step 1: Make the Dough with Cold Butter
In a large bowl, whisk together the 4.5 cups all-purpose flour, 0.5 tsp salt, and 0.015 oz active dry yeast. In a separate bowl, beat the 1 whole large egg with the 0.25 cup warmed whole milk and 0.25 cup granulated sugar until smooth. Gradually mix the wet ingredients into the dry, then cut in the 1.5 cups cold cubed unsalted butter using a pastry cutter or your fingers until the mixture resembles coarse crumbs.
This is where the magic happens—I press the dough together gently until it forms a shaggy mass. Wrap it tightly in plastic and refrigerate for at least 1 hour (up to 24 hours works even better). The cold butter creates those signature flaky layers when baked. Don't skip this step—it's non-negotiable for that perfect texture.
🍳 Step 2: Prepare the Almond Filling
In a medium bowl, beat the 8 oz room-temperature cream cheese with the 0.25 cup powdered sugar and 0.5 tsp vanilla extract until completely smooth. Add the 0.75 cup almond paste and mix until fully incorporated. The filling should be thick but spreadable—if it's too stiff, add a teaspoon of milk at a time until it reaches the right consistency.
This is your nutty-sweet heart. I like to press it through a fine-mesh sieve to remove any lumps, which gives a smoother final product. Cover and refrigerate while you roll out the dough. The filling needs to be cold too—it melts beautifully in the oven and creates that gooey center we all love.
🥘 Step 3: Roll and Fill the Danish
On a lightly floured surface, roll the chilled dough into a 12x16-inch rectangle about 1/8-inch thick. Using a pastry brush, lightly brush the entire surface with milk, then sprinkle with a little extra granulated sugar for color. Spread the almond filling evenly over the dough, leaving a 1-inch border around the edges.
Here's the thing—don't overfill. You want enough to create that signature bulge but not so much that it oozes out during baking. I use an offset spatula to smooth the filling into an even layer. Once filled, carefully roll the dough up tightly from the long side, pinching the seam to seal. Trim the ends if needed.
🔥 Step 4: Shape and Proof the Danish
Cut the rolled dough into 6 equal pieces and shape each into a crescent. Place them on a parchment-lined baking sheet, spacing them about 2 inches apart. Cover loosely with a clean kitchen towel and let them proof in a warm place for 30-45 minutes until they've puffed up about 50%. They should look plump and slightly domed—this is your signal they're ready for the oven.
I like to proof them at room temperature rather than in the fridge. This gives a more pronounced rise and better flavor development. Don't let them proof too long or they'll collapse in the oven. The edges should be soft but not sticky when you test them.
🔥 Step 5: Bake to Golden Perfection
Preheat your oven to 375°F. Brush the tops of the danishes with a little milk, then sprinkle with the 0.25 cup almond slices for that classic garnish. Bake for 18-22 minutes until they're deep golden brown and the filling is bubbling at the edges. The centers should still be slightly soft—they'll firm up as they cool.
This is where patience pays off. If you open the oven door too early, they'll sink. Let them bake undisturbed until you see that beautiful caramelization. When done, transfer to a wire rack and let cool for 10 minutes before serving. The filling will be warm and gooey, with those crispy, flaky layers you dream about.
Pro Tips For Making Almond Cheese Danish
- Chill the Dough Twice: I learned this the hard way—skipping the second rest in the fridge makes the butter too soft for rolling. After shaping, pop the dough back in the fridge for at least 30 minutes. The difference in handling? Night and day.
- Use Cold Butter: No one likes fighting sticky dough. Cut that unsalted butter straight from the fridge into cubes—no need to soften it at all. The cold pieces will distribute evenly and keep the layers crisp, not greasy.
- Proof the Yeast Slowly: That yeast needs time to wake up properly. Mix the warm water (110°F, not boiling) with sugar first, then sprinkle in the yeast and wait exactly 5 minutes for it to bubble before adding flour. Rushing this step means your danishes won’t rise right.
- Brush Layers Lightly: A common mistake? Overdoing the egg wash between layers. Use just enough beaten egg to lightly coat the dough—about 1 tablespoon per layer—so the filling stays put without turning soggy. Trust me, you don’t need a pool of egg.
Common mistakes when making this dish
Skipping Cold Butter
One of the biggest mistakes is using warm or softened butter in the dough. The cold butter is what creates those signature flaky layers through the lamination process. If your butter melts during mixing, you'll end up with a dense, cake-like texture instead of light, crisp layers.
I always keep my butter in the freezer for 10-15 minutes before cubing it to ensure it stays firm. If you notice your dough feels too sticky or doesn't hold its shape when rolling, your butter wasn't cold enough. 🧈
Overfilling the Danish
Another common error is overfilling the danish with too much almond cream cheese mixture. When the filling expands in the oven, it can burst through the dough, creating a messy presentation and potentially underbaked edges. I recommend leaving a 1-inch border around the edges when spreading the filling.
If you're unsure, err on the side of less filling—it's easier to add more than to fix a burst danish. The filling should create a gentle bulge, not a mountain.
Underproofing the Dough
Skipping the proofing step or not allowing enough time for the dough to rise leads to dense, flat danishes that lack that beautiful, airy texture. The dough should puff up by about 50% during proofing—this means it should look noticeably larger and slightly domed.
If you're in a hurry, don't rush it. Proofing at room temperature for 30-45 minutes gives the best rise. If your danishes look flat after baking, they likely didn't proof long enough. A toothpick inserted into the dough should come out with a few small bubbles, not clean.
Overbaking the Danish
It's tempting to check on your danishes early, but opening the oven door too soon can cause them to sink. The danishes are done when they're deep golden brown and the filling is bubbling at the edges.
If you pull them out too early, the centers will be undercooked and gummy. If you overbake them, they'll turn dry and the filling will be rubbery. I set a timer for 18-22 minutes and resist the urge to peek. The internal temperature should reach 190-200°F for perfect doneness. 🔥
Not Brushing with Milk
Many home bakers forget to brush the tops of the danishes with milk before baking. This step creates a beautiful golden color and adds a subtle sheen to the finished product. The milk also helps the almond slices toast slightly, adding a nice crunch.
I use a pastry brush to lightly coat the tops right before baking. If you skip this, your danishes will lack that professional, bakery-style finish. A quick brush with milk makes all the difference.
Using Low-Fat Cream Cheese
Substituting low-fat or reduced-fat cream cheese for the full-fat version can drastically alter the texture of your filling. Full-fat cream cheese melts beautifully in the oven, creating that rich, gooey center we all love. Low-fat versions can turn grainy or dry.
I always use Philadelphia full-fat cream cheese—it's the gold standard for this recipe. If you're making a dairy-free version, use a high-quality vegan cream cheese that mimics the fat content as closely as possible. The filling should be thick but spreadable, not stiff or crumbly.
Nutrition facts
Frequently asked questions
Can I make this almond cheese danish without yeast?
Yes! For a quick version, replace the yeast dough with a shortcrust pastry (mix 2.5 cups flour, 1 cup cold butter, 0.25 cup powdered sugar, and 1 egg yolk). Roll it out, spread the filling, and fold into a crescent. Bake at 375°F for 15-18 minutes. The texture will be slightly denser but still delicious.
How do I store leftovers to keep them fresh?
Store baked danishes in an airtight container at room temperature for 1-2 days. For longer storage, freeze them (unbaked or baked) for up to 1 month. To reheat, warm in a 350°F oven for 10 minutes or microwave for 20 seconds. The filling stays gooey when reheated properly!
Can I substitute almond paste with something else?
For a nutty flavor, blend 1 cup almond flour + 0.25 cup powdered sugar until smooth. Or try marzipan (though it's sweeter). For a different texture, mix 0.5 cup crushed almonds + 0.25 cup powdered sugar into the cream cheese. The filling will still be rich and flavorful!
Why did my danishes turn out dense instead of flaky?
Dense danishes usually mean one of three things: butter wasn't cold enough (use frozen butter next time), dough wasn't chilled before rolling, or proofing was rushed. Let the dough rest 1 hour in the fridge after mixing, and proof until it doubles in size. Patience is key for that signature flaky texture!
Can I make this recipe ahead of time?
Yes! Prepare the dough and filling 1 day ahead, then refrigerate separately. Assemble the danishes in the morning and proof/bake fresh. For unbaked danishes, freeze them on a tray before transferring to a bag (up to 1 month). Thaw overnight in the fridge before baking.