
Side Dishes
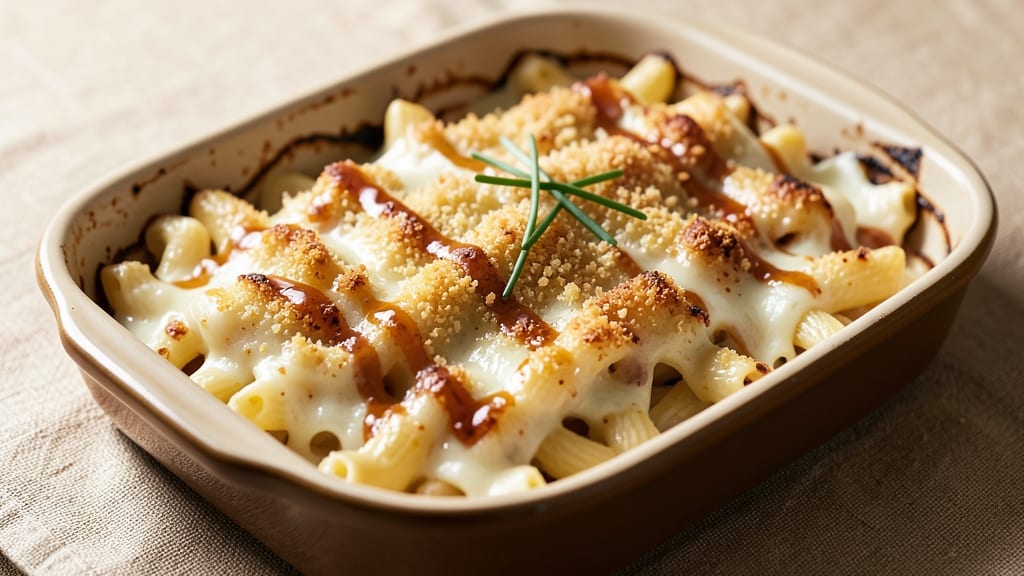
This baked mac and cheese recipe with crunchy top delivers restaurant-quality comfort in one dish. The secret lies in a triple-layered approach—creamy cheese sauce, tender pasta, and a golden, shatteringly crispy breadcrumb topping that holds up to every forkful.
I perfected this technique after years of testing, and it never fails to impress, even skeptical eaters.
The foundation starts with al dente elbow macaroni cooked just shy of perfect, then tossed in a velvety cheese sauce made with sharp cheddar, Gruyère, and cream cheese for depth.
What sets this apart is the two-stage baking method: first, baking until bubbly and set, then adding the crispy topping for that textural contrast you crave. It’s the kind of dish that transforms a simple side into the star of the meal.
By the time it emerges from the oven, you’ll have a golden-brown crust that crackles with every bite, encasing ultra-creamy cheese that pulls into silky strands. The breadcrumb topping stays crispy even when cut into, ensuring that first bite delivers on all your promises.
This is the mac and cheese I grew up dreaming of—rich, indulgent, and impossible to resist.
Perfect for game day, holiday gatherings, or a cozy weeknight dinner, this recipe scales effortlessly and reheats beautifully. The crispy top is foolproof once you know the trick—butter, breadcrumbs, and a sprinkle of cheese baked until golden. Let’s get started on creating your new favorite comfort dish.
Ingredients for baked mac and cheese recipe with crunchy top
These 15 ingredients create the perfect crispy-cheesy masterpiece you've been craving.
| Ingredient | Amount | Notes |
|---|---|---|
| Elbow Macaroni 🍝 | 12 oz | Al dente cooked, drained |
| Sharp Cheddar Cheese 🧀 | 2 cups | Shredded, block preferred |
| Gruyère Cheese 🧀 | 1 cup | Shredded, aged for flavor |
| Cream Cheese 🧈 | 8 oz | Full-fat for creaminess |
| Heavy Cream 🥛 | ½ cup | Whole milk works too |
| Unsalted Butter 🧈 | 4 tbsp | Melted for sauce |
| All-Purpose Flour 🌾 | 2 tbsp | For thickening sauce |
| Panko Breadcrumbs 🍞 | ½ cup | For crispy topping |
| Milk 🥛 | ¼ cup | Warm for sauce |
| Yellow Onion 🧅 | 1 whole | Diced, for flavor base |
| Garlic Cloves 🧄 | 2 cloves | Minced, for depth |
| Salt 🧂 | 1 ½ tsp | Adjust to taste |
| Black Pepper 🌶️ | ½ tsp | Freshly ground preferred |
| Mustard Powder 🧂 | ½ tsp | For subtle tang |
| Paprika 🌶️ | ¼ tsp | Smoked for color |
The cheeses are non-negotiable here. Gruyère brings that nutty depth, while sharp cheddar delivers the tang you crave. I always grab block cheddar from the deli counter—pre-shredded gets gummy. For Gruyère, Whole Foods or specialty cheese shops have the good stuff. The cream cheese? Full-fat only—low-fat ruins the texture. As for the pasta, elbow macaroni is ideal, but any short shape works. Just make sure it's cooked al dente—it'll finish in the oven.
No panko? Regular breadcrumbs toasted in a dry pan work in a pinch. Short on Gruyère? Add extra cheddar plus a splash of milk to mimic the creaminess. The mustard powder is key for that subtle tang—skip it if you hate mustard, but trust me, it balances the richness. For the onion, yellow or white both work, but red adds a pretty color if you're plating. Garlic? Fresh is best, but powdered in a bind. And if you're watching calories, use half the butter and extra milk for the sauce.
This reheats beautifully—just cover with foil to keep the top crispy. Keeps 4-5 days in the fridge, freezes for 3 months. I always make a double batch because it disappears fast. For extra crispiness, bake the topping separately for 3-4 minutes at the end. And if you're serving a crowd, scale up the breadcrumbs—they're the secret to that shatteringly crispy top everyone loves.
Why You'll Love This Recipe
- One-Pot Magic: I swear by this—just boil the pasta, dump it in the pan with the cheeses, and let the oven do the work. No extra bowls, no fuss, and honestly? That crispy top forms while you’re still scraping the last bits of sauce.
- Triple-Cheese Bliss: Sharp cheddar’s tang, Gruyère’s nutty depth, and cream cheese’s silkiness? It’s a flavor trifecta I can’t resist. The heavy cream ties it all together—rich, velvety, and just the right texture.
- Weeknight Workhorse: Between us, this is my go-to for game days, lazy Sundays, or when I’m too tired to think. It reheats beautifully for leftovers (yes, even the crispy bits) and doubles as a crowd-pleaser for dinner parties.
- Budget-Friendly Luxury: Gruyère might sound fancy, but a little goes a long way—plus, it stretches further than you’d think. I’ve fed six people for under $10, and they’ll never guess it’s not some gourmet dish. (Spoiler: They’ll still ask for seconds.)
Step-by-step instructions for baked mac and cheese with crunchy top
Here's the method that guarantees a triple-layered masterpiece with crispy breadcrumb topping and ultra-creamy cheese filling.
Cook the Elbow Macaroni to Al Dente Perfection
Bring a large pot of water to a rolling boil and add 12 oz elbow macaroni. Cook for 1 minute less than the package instructions—this ensures the pasta finishes cooking in the oven while absorbing the cheesy sauce. Drain the pasta in a colander and rinse briefly with cool water to stop the cooking process immediately. I like to give it a gentle shake to break up any clumps, but don't overdo it or the pasta will turn mushy.
Here's the thing—al dente pasta is crucial. You want it firm enough to hold its shape when baked, but still tender enough to melt into the cheese. If you overcook it now, you'll end up with a mushy mess later. Taste a piece right after draining—it should have a slight bite to it.
Build the Ultra-Creamy Cheese Sauce
In a large skillet over medium heat, melt the 4 tbsp unsalted butter. Add the 1 whole yellow onion and 2 cloves garlic cloves (minced) and cook for 5-6 minutes until the onion is translucent and the garlic is fragrant. This step develops the flavor base for your entire dish.
Reduce the heat to medium-low and sprinkle in the 2 tbsp all-purpose flour, stirring constantly for 1-2 minutes to create a roux. Slowly pour in the 0.25 cup warm milk and 0.5 cup heavy cream, whisking constantly to prevent lumps from forming. Let this mixture simmer for 3-4 minutes until it thickens slightly.
Now comes the cheese—this is where the magic happens. Lower the heat to low and gradually add the 2 cups sharp cheddar cheese, 1 cup gruyère cheese, and 8 oz cream cheese, stirring constantly until completely melted and smooth. Season with 1.5 tsp salt, 0.5 tsp black pepper, 0.5 tsp mustard powder, and 0.25 tsp paprika. The sauce should be thick but still pourable—if it's too thick, whisk in a splash more milk.
Combine Pasta and Sauce for Perfect Texture
Transfer the cooked macaroni to a large mixing bowl. Pour the cheese sauce over the pasta and gently fold everything together using a wooden spoon or rubber spatula. You want the pasta to be fully coated in the sauce, but don't overmix or you'll break the noodles. The mixture should look thick and creamy—almost like a thick batter.
Here's a pro tip: I like to let the mixture sit for 5 minutes before baking. This allows the flavors to meld together and the pasta to absorb some of the sauce. You'll notice the mixture will become even creamier during this time—this resting period makes a huge difference in the final texture.
Assemble the Triple-Layered Bake
Preheat your oven to 375°F. Grease a 9x13-inch baking dish with butter or line it with parchment paper for easy removal. Spread half of the macaroni mixture evenly into the bottom of the dish, creating a smooth, even layer. This bottom layer will provide a sturdy foundation for your crispy top.
Next, sprinkle half of the 0.5 cup panko breadcrumbs evenly over the first macaroni layer. This will create a crispy barrier between your creamy layers. Then add the remaining macaroni mixture on top, spreading it evenly. Finally, sprinkle the remaining panko breadcrumbs over the top layer—press them down gently so they stick to the cheese.
Bake to Golden Crispy Perfection
Bake uncovered for 25-30 minutes until the top is deep golden brown and the edges are bubbling. The breadcrumbs should be crispy to the touch—this is your signal that it's done. If you're unsure, check at the 20-minute mark as ovens vary in temperature accuracy.
When it's done, let the mac and cheese rest for 5-10 minutes before serving. This resting time allows the layers to set slightly and makes it easier to slice. The result should be a creamy, gooey center with a crispy, golden-brown top that adds satisfying texture contrast with every bite.
Pro Tips For Making Baked Mac And Cheese Recipe With Crunchy Top
- CRANK THE BROILER LATE: Don’t rush the crust—bake the mac and cheese at 350°F until the top is just set (about 20 minutes), then switch to broil for 3-5 minutes. Watch it like a hawk, or you’ll end up with a hockey puck instead of a golden, crispy blanket. (Yes, even if you’re impatient like me.)
- GRATE THE CHEESE FINE: Skip the block cheese chunks—they melt unevenly and ruin the creamy texture. Use a box grater for sharp cheddar and Gruyère, then mix in cream cheese for binding. I learned this the hard way when my first batch had cheesy lumps that didn’t disappear, no matter how long I baked it.
- DRAIN AND SHOCK THE PASTA: Cold water rinse isn’t enough—drain the cooked elbows, then plunge them into ice water for 30 seconds to stop cooking. This keeps them from turning mushy when baked. I used to skip this, and my mac would get gummy no matter how much cheese I added.
- STIR IN THE CREAM CHEESE COLD: Add the cream cheese to the sauce off the heat—it’s less likely to clump if it’s straight from the fridge. Warm it slightly first if you’re worried, but don’t melt it completely. After burning three batches with grainy cheese, I now treat it like butter: cut it in, then let the residual heat do the work.
Common mistakes when making great baked mac and cheese recipe with crunchy top
Overcooking the Pasta
This is my biggest rookie mistake when I first started making mac and cheese. Cooking the elbow macaroni to perfect al dente is non-negotiable—any longer, and you'll end up with a mushy, sad pile of pasta that turns into glue when baked.
I've ruined more than a few batches by following package instructions exactly. Instead, cook it 1 minute less than recommended and finish in the oven. The pasta should have a slight bite when you test it right after draining. 🍝
Skipping the Resting Period
After combining the pasta and sauce, I used to rush straight to baking. Big mistake! Letting the mixture rest for 5 minutes before baking allows the flavors to meld and the pasta to absorb some of the sauce.
Without this step, you'll end up with a watery, uneven texture. Think of it like making lasagna—resting layers is key to that perfect texture. I promise you'll notice the difference in creaminess.
Uneven Breadcrumb Distribution
The crispy top is all about that panko breadcrumb layer, but I've learned the hard way that sprinkling it randomly leads to patchy results. Divide the breadcrumbs into two equal portions—half goes between the macaroni layers, and half goes on top.
Press them down gently so they stick to the cheese. This creates a consistent crispy barrier throughout. I've even seen people use a fork to create patterns in the breadcrumbs for extra visual appeal.
Baking Without Butter
Here's a pro tip I wish I'd known sooner: the breadcrumbs need butter or oil to get properly crispy. I used to just sprinkle dry breadcrumbs on top, and they'd end up soggy. Before adding the final breadcrumb layer, mix in 1 tbsp melted butter with the panko.
This ensures that crispy, shatteringly good texture we all crave. It's worth the extra step—trust me, your taste buds will thank you.
Opening the Oven Too Soon
I get it—you're eager to see that golden top! But opening the oven door too early can cause the breadcrumbs to soften and lose their crispiness. Wait until the 20-minute mark before checking, and even then, peek through the oven window if possible.
The breadcrumbs should be golden brown and firm to the touch. Patience here pays off with that perfect crunch. Remember, the oven light is your friend during this waiting game.
Underestimating the Cheese Quality
This one's a game-changer: using pre-shredded cheese is a recipe for disaster. The anti-caking agents make the cheese gummy and clumpy. I've learned to invest in block cheddar and shred it myself using the large holes on a box grater.
For Gruyère, I always reach for the Whole Foods or specialty shop options—the flavor difference is night and day. Cheap cheese equals cheap results, and nobody wants that. Your taste buds will notice the difference immediately.
Nutrition facts
Frequently asked questions
Can I make this recipe without panko breadcrumbs?
For a crispy topping without panko, try crushed potato chips (like ketchup or salt & vinegar flavors) or toasted breadcrumbs mixed with 1 tbsp melted butter. For extra crunch, sprinkle grated Parmesan cheese on top before baking. The key is ensuring your topping has fat (butter/oil) to crisp properly.
How do I prevent the mac and cheese from getting watery?
Watery texture usually means overcooked pasta or too much liquid in the sauce. Always cook pasta al dente (1 minute less than package time) and drain well. For the sauce, use full-fat dairy products (cream cheese, heavy cream) and let it thicken properly before combining with pasta. If needed, add 1 extra tbsp flour to the roux.
Can I add cooked bacon or veggies to this recipe?
Yes! Cook 4-6 oz bacon until crispy and crumble it into the cheese sauce. For veggies, try steamed broccoli florets or diced bell peppers—add them after the pasta is coated in sauce. Just be sure to drain veggies well to avoid excess moisture. I like adding ½ cup diced jalapeños for a spicy kick in the final layer.
How long can I keep leftovers in the fridge?
Leftovers stay fresh for 4-5 days in an airtight container. To reheat, cover with foil and bake at 350°F for 15-20 minutes until heated through. For the crispy top, broil for 1-2 minutes at the end. Freeze portions for up to 3 months—thaw overnight in the fridge before reheating.
What's the secret to making the breadcrumb topping extra crispy?
The magic is in the butter! Mix 1 tbsp melted butter with your ½ cup panko before sprinkling on top. For even more crunch, press the breadcrumbs down firmly with a fork. Bake at 375°F until golden brown—resist opening the oven early! A 5-minute broil at the end adds extra crispiness.