
Side Dishes
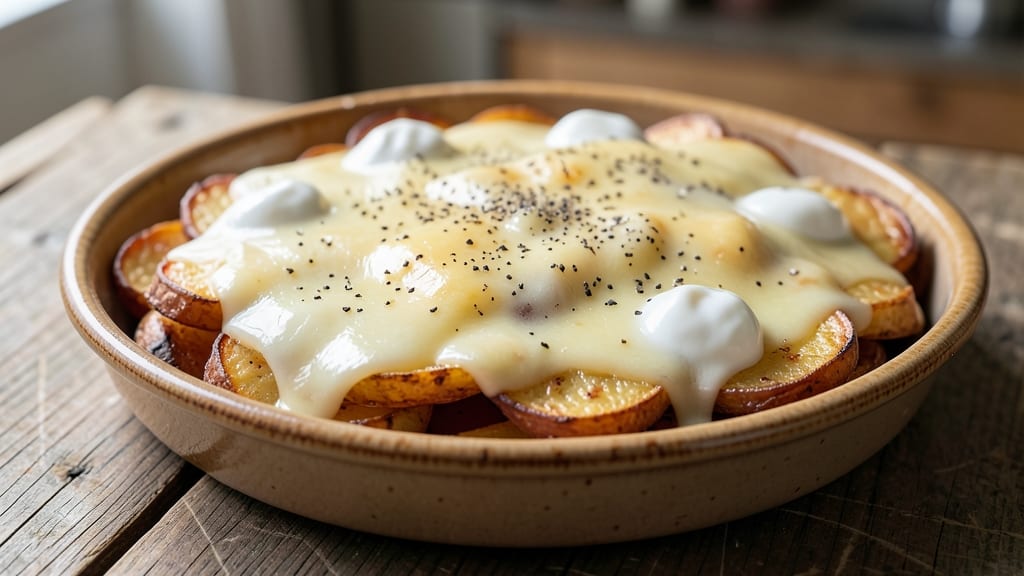
This American cheese potato recipe delivers the ultimate comfort food experience—crispy golden edges and gooey, pull-apart cheese rivers that make every bite irresistible. The secret lies in layering thin potato slices with melted American cheese until they form a bubbling, golden crust that's impossible to resist.
I've perfected this technique over years of testing, and it never fails to disappear from the table.
What sets this dish apart is the balance of textures: tender, fluffy potatoes underneath a crispy top layer, all blanketed in stretchy, melty cheese. The recipe uses simple pantry staples—potatoes, American cheese, butter, and a touch of cream—to create something restaurant-quality without the fuss.
It's the kind of dish that transforms a casual dinner into a special occasion.
By the time it emerges from the oven, you'll have a crispy crust that shatters slightly when you cut into it, revealing rivers of melted cheese beneath. The aroma alone will have everyone gathering around the table, and the first bite delivers that perfect combination of textures and flavors.
This is comfort food at its finest—warm, cheesy, and completely satisfying.
Perfect for feeding a crowd or meal prepping for the week, this recipe scales beautifully while maintaining that perfect balance of crispy edges and creamy centers. The best part?
It only requires 45 minutes in the oven, making it ideal for busy weeknights or weekend gatherings. Let's get started on creating this cheesy masterpiece.
Ingredients for american cheese potato
These simple staples transform into a crispy, cheesy masterpiece that disappears faster than you can say 'bubbling rivers'.
| Ingredient | Amount | Notes |
|---|---|---|
| Russet Potatoes 🥔 | 3 lbs | Thinly sliced, uniform thickness |
| American Cheese Slices 🧀 | 16 oz | Processed, single slices preferred |
| Unsalted Butter 🧈 | ¾ cup | Cold, cubed for layering |
| Heavy Cream 🥛 | ½ cup | Full-fat for richness |
| Salt 🧂 | 1 ½ tsp | Kosher or sea salt |
| Black Pepper 🌶️ | ½ tsp | Freshly cracked |
| Garlic Powder 🧄 | ½ tsp | For subtle depth |
| Onion Powder 🧅 | ½ tsp | Optional, for extra flavor |
| All-Purpose Flour 🌾 | ¼ cup | For crispy crust |
| Fresh Parsley 🌿 | ¼ cup | Chopped, for garnish |
| Milk 🥛 | ¼ cup | Whole milk for creaminess |
The potatoes are the star—Russets are non-negotiable for that fluffy interior. Grab a mandoline or sharp knife for even slices (about 1/8-inch thick), and don’t skip the soak in cold water for 10 minutes to remove excess starch. Kroger or Walmart usually carry them in 5-lb bags—perfect for this recipe. The American cheese? Kraft Singles work perfectly, but if you’re feeling fancy, grab Boar’s Head slices for a creamier texture. Pre-sliced cheese saves time, but if you’re cutting your own, use a hot knife for clean slices that melt beautifully.
No mandoline? A serrated knife works too, just take your time. Running out of American cheese? Mozzarella and cheddar blend at a 50/50 ratio mimics that stretchy melt. The heavy cream can be swapped for half-and-half if you’re watching fat, but trust me on the full-fat version—it’s worth the extra richness. For the crispy top, the flour is key, but if you’re out, crushed cornflakes or panko add crunch too. The garlic and onion powders? Optional but add depth—skip ‘em if you’re keeping it basic.
This dish reheats like a dream—just pop slices in the oven at 375°F for 5-10 minutes until bubbly. Store leftovers in the fridge for up to 4 days, but honestly, it’s best fresh. For meal prep, assemble the casserole, cover, and refrigerate for up to 24 hours before baking. The cheese gets even gooier the second time around, so double the recipe if you’re feeding a crowd—it’ll vanish faster than you think.
Why You'll Love This Recipe
- One-Pan Magic: I swear by this recipe because it’s the kind of meal where you peel, cube, and toss—then walk away. No chopping onions, no mincing garlic, just potatoes and cheese sliding into the oven while you stir a pot of cream. That’s it. The butter and cream do all the heavy lifting.
- Cheese Pull Perfection: Between us, American cheese isn’t fancy, but melted? That’s where the magic happens. The slices soften into gooey blankets over the potatoes, and the heavy cream ties it all together like a creamy hug. It’s the kind of dish where every bite feels indulgent—no fancy ingredients required.
- Lunchbox Hero: I make this for my kids’ lunches all the time. Cold or reheated, it’s a hit—especially when I slice it into squares and pack it with a side of apples. Honestly, it’s my go-to for school nights because it reheats like a dream and never gets soggy.
- Budget Comfort: Russets and American cheese are pantry staples, and this recipe stretches them far. I’ll often double the batch, store half in the fridge, and pull it out for a lazy dinner or a quick breakfast hash. It’s the kind of meal that makes you feel like you’re treating yourself without breaking the bank.
Step-by-step instructions for American cheese potato casserole
Here's how to create that perfect golden crust and gooey cheese pull-apart texture everyone loves.
Prep and Layer the Potatoes
Preheat your oven to 375°F—this temperature gives you that ideal balance of crispy crust and tender potatoes. Peel and thinly slice the 3 lbs russet potatoes into ⅛-inch thick rounds. You want uniform slices so they cook evenly and create that perfect layered texture.
In a large bowl, toss the potato slices with 1 tablespoon of the 1.5 tsp salt, 0.25 tsp of the 0.5 tsp black pepper, and 0.25 tsp of the 0.5 tsp garlic powder. This seasoning will infuse the potatoes as they cook, giving them subtle flavor without overpowering the cheese. Spread half of the seasoned potatoes evenly in a 9x13-inch baking dish.
Build the Cheese and Butter Layers
Cut the 16 oz American cheese slices into quarters and layer half of them over the potatoes, slightly overlapping for maximum melty goodness. Dot evenly with ⅓ cup of the 0.75 cup unsalted butter, cubing it first so it melts into the layers. This butter creates the perfect creamy base between the crispy layers.
Add the remaining potatoes in another even layer, then top with the remaining cheese and ⅓ cup of the butter. Finish with the rest of the 0.5 tsp black pepper, 0.25 tsp garlic powder, and 0.25 tsp onion powder. The cheese should peek through the top layer—this is what creates those gorgeous pull-apart cheese rivers when it bakes.
Create the Crispy Crust Mixture
In a small bowl, whisk together the 0.25 cup all-purpose flour, remaining 0.5 tsp salt, and 0.25 cup milk until smooth. This creates a light, crispy topping that contrasts perfectly with the creamy interior. Pour this mixture evenly over the top of the potato casserole, spreading it gently with a spatula.
Here's the secret: Don't skip spreading the mixture evenly. The crust should be thin but continuous—this ensures it crisps up perfectly while still allowing the cheese to melt through. The flour mixture will bubble and turn golden brown as it bakes, creating that irresistible crunch.
Bake to Golden Perfection
Bake uncovered for 45-50 minutes until the top is deep golden brown and the edges are crispy. You'll know it's ready when you see bubbles forming through the crust and the cheese is melting dramatically in the center. The potatoes should be tender enough to pierce easily with a fork.
Real talk: Don't be tempted to open the oven early to check. Every time you open it, you lose heat and steam, which can make the crust soggy. If you're worried, use the window to peek—you should see that beautiful golden color before it's time to check with a fork.
Finish with Creamy Topping and Garnish
Remove from the oven and let it rest for 5 minutes—this gives the cheese time to set slightly. While it rests, heat the 0.5 cup heavy cream in a small saucepan over medium heat until it just begins to simmer. Pour this hot cream over the top of the casserole, letting it soak into the crust and create that luscious sauce.
Sprinkle the 0.25 cup chopped fresh parsley over the top for a fresh pop of color and flavor. The parsley adds brightness that cuts through the richness of the cheese. Serve immediately while the crust is still crispy and the cheese is meltier than you can handle. This dish tastes even better the next day, but trust me—it won't last that long!
Pro Tips For Making American Cheese Potato
- BOIL POTATOES UNTIL TENDER: I used to pull them out when they looked "done," but Russets need to be fork-tender—test with a knife first. Overcooked potatoes turn to mush when mixed with cream, so aim for just under "perfect" doneness.
- SALT THE POTATOES BEFORE MASHING: Skip salting after cooking—it’s too late. Toss peeled potatoes in salted water before boiling (about 1 tsp per pound), and the flavor seeps in evenly. Trust me, your taste buds will notice the difference.
- MELT CHEESE IN STAGES: Dumping all the American cheese at once makes a greasy mess. Layer it in: melt half in the hot cream first, stir until smooth, then add the rest. This keeps the sauce silky instead of separating.
- USE COLD BUTTER FOR CREAMY TEXTURE: Warm butter + hot cream = lumps. Whisk in cold butter cubes (about 4 tbsp) at the end—it melts into a velvety sauce without breaking the emulsion. Yes, it sounds counterintuitive, but it works.
Essential equipment for great american cheese potato
Baking Dish Essentials
A 9x13-inch baking dish is non-negotiable for this recipe—it provides the perfect surface area for even browning and crispy edges. I recommend a heavy-duty stainless steel dish like the Calphalon Classic or USA Pan—they distribute heat evenly and prevent warping.
Avoid glass if you're feeding a crowd, as it can crack under the weight of this cheesy masterpiece. 🔥
For a 9-inch round dish, reduce the recipe by about 25%—the layers will be thicker, but you'll still get that pull-apart texture. If you're making this for a party, consider two 9x13-inch dishes instead of one—it bakes more evenly and serves more guests without overcrowding.
Mandoline vs. Knife
Uniform potato slices are key to consistent cooking. A mandoline like the OXO Good Grips gives you ⅛-inch thick slices every time, but a sharp chef's knife works too if you're patient. For the knife method, I use a Wüsthof Classic—its precision edge makes clean cuts.
Soak your slices in cold water for 10 minutes to remove excess starch, which prevents a gummy texture. 🥔
Pro tip: If you don’t have a mandoline, use a serrated knife and a ruler as a guide. Angle the blade slightly for even slices. The goal is consistency—thicker slices take longer to cook and may stay underdone while thinner ones crisp too quickly.
Cheese Tools Matter
For American cheese slices, a hot knife is your best friend—it melts the cheese slightly as you cut, creating cleaner slices that melt beautifully. Run your knife under hot water between cuts, or briefly pass it over a gas flame.
I use a Victorinox 8-inch chef’s knife for this—it’s sharp enough to slice through the cheese without tearing. 🧀
If you’re using pre-sliced cheese, check for thickness uniformity. Kraft Singles work perfectly, but Boar’s Head slices melt even more dramatically. For extra stretch, layer cheese slightly overlapping—this creates those iconic pull-apart rivers when baked.
Crust-Making Tools
The flour-milk crust is what gives this dish its signature crunch. A small mixing bowl and whisk are all you need, but a pastry brush helps spread the mixture evenly.
For extra crispiness, I sometimes add 1 tablespoon melted butter to the flour mixture before pouring it over the top. 🌾
If you’re short on flour, crushed cornflakes or panko breadcrumbs work in a pinch—they add texture without altering the flavor. Just mix ¼ cup crumbs with 2 tablespoons milk for a quick substitute. The key is to spread it thinly—a thick layer won’t crisp properly.
Resting and Serving
A cooling rack is ideal for resting the dish, but a wire rack on top of a baking sheet works too. This prevents sogginess from steam buildup.
Let it rest for 5 minutes before adding the hot heavy cream—this ensures the cheese sets slightly so it doesn’t slide off when you serve. ✨
For serving, I love using a large serving spoon to scoop out generous portions. The crust should shatter slightly, revealing those gooey cheese rivers underneath. Garnish with fresh parsley right before serving—it adds a pop of color and freshness that balances the richness.
Nutrition facts
Frequently asked questions
Can I make this recipe with sweet potatoes instead of russets?
Sweet potatoes work, but they'll change the texture dramatically. They're denser and less starchy, so they won't get as fluffy or crispy. If you must use them, slice them slightly thinner (1/16-inch) and bake for 10-15 minutes longer. The flavor will be sweeter and nuttier, but you'll lose that classic potato casserole texture.
Why did my crust turn out soggy instead of crispy?
Soggy crusts usually happen from one of three things: opening the oven too early, not spreading the flour mixture evenly, or using too much milk. Always bake uncovered until golden brown (45-50 minutes), spread the crust mixture thinly, and use exactly 1/4 cup milk. If your oven runs hot, reduce temp to 350°F for the last 10 minutes to prevent over-browning.
How can I make this dish ahead of time?
This casserole actually tastes better the next day! Assemble it completely (including the crust), cover tightly, and refrigerate for up to 24 hours before baking. For leftovers, reheat covered at 350°F for 15-20 minutes until bubbly. The cheese gets even more gooey when reheated—just add a splash of milk to restore crispiness if needed.
What's the best way to store leftovers?
Store in an airtight container for up to 4 days in the fridge. For longer storage, freeze portions for up to 3 months. To reheat frozen portions, thaw overnight in the fridge first, then cover with foil and warm at 350°F for 25-30 minutes. The texture won't be quite as crispy, but the cheesy goodness remains!
Can I use a different type of cheese?
American cheese is key for that signature melt and stretch, but you can experiment! For a creamier texture, try a 50/50 mix of American and Mozzarella. For extra sharpness, add 1/2 cup shredded cheddar to the layers. Avoid cheeses like Swiss or Parmesan—they won't melt the same way and may make the crust too dry.