
Appetizers
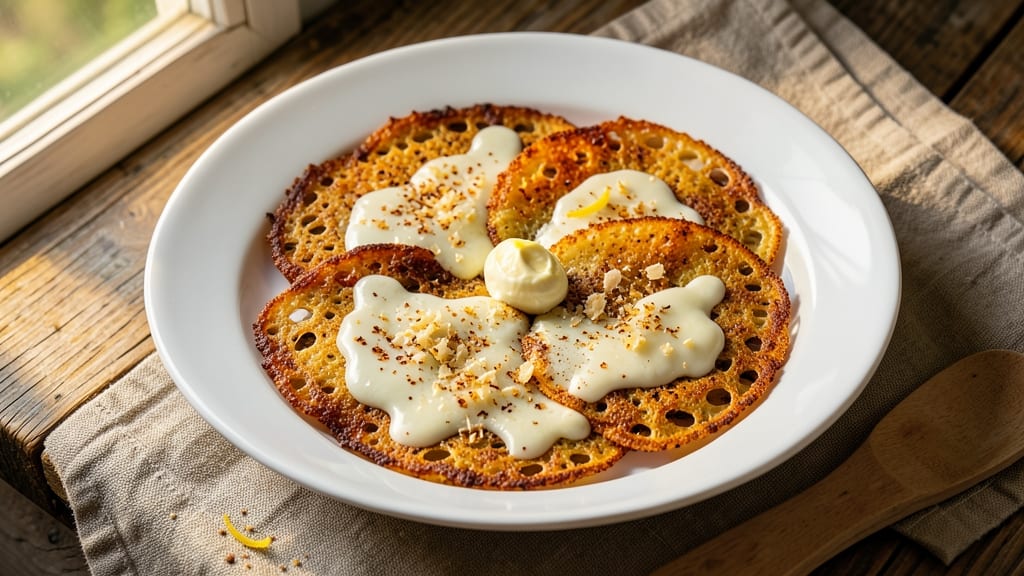
This baked cheese slices recipe delivers the perfect balance of crispy tortilla crunch and gooey, pull-apart cheese layers that disappear faster than you can say "appetizer." The secret lies in layering thin cheese slices with crispy tortillas and baking until golden—creating a texture that's both satisfying and addictive.
I developed this recipe after years of testing different methods, and this version consistently delivers restaurant-quality results at home.
The beauty of this recipe is its versatility—it works as a standalone appetizer, a side dish for soups, or even a hearty snack when paired with your favorite dips.
The tortillas add a satisfying crunch that contrasts beautifully with the melted cheese, while the baking process ensures every slice is perfectly crispy on the outside and tender on the inside. No fancy equipment is needed, just a baking sheet and a few simple ingredients.
What you'll end up with is a platter of golden, crispy cheese slices that are easy to pick up and devour. The cheese melts just enough to create those irresistible pull-apart layers, while the tortillas hold their shape for that satisfying crunch.
This recipe is foolproof, making it perfect for beginners or anyone looking to impress guests with minimal effort.
Serve warm with marinara, ranch, or a spicy salsa for dipping, and watch these disappear in minutes. The best part? You can customize the toppings—add herbs, jalapeños, or even a sprinkle of breadcrumbs for extra texture. Let's get started on creating this crowd-pleasing appetizer!
Ingredients for baked cheese slices
Eight simple ingredients transform into crispy tortilla crunch with melty pull-apart cheese layers.
| Ingredient | Amount | Notes |
|---|---|---|
| Large Flour Tortillas 🌯 | 8 whole | Flour, not corn, for crispiness |
| Mozzarella Cheese 🧀 | 16 oz | Low-moisture, sliced paper-thin |
| Parmesan Cheese 🧀 | ½ cup | Freshly grated, for topping |
| Butter 🧈 | ½ cup | Unsalted, melted for brushing |
| All-Purpose Flour 🌾 | ¼ cup | For breading extra crunch |
| Garlic Powder 🧄 | 1 tsp | For seasoning flour mix |
| Ground Black Pepper 🌶️ | ½ tsp | Freshly cracked for heat |
| Olive Oil 🫒 | 1 tbsp | For greasing baking sheet |
| Fresh Basil Leaves 🌿 | ¼ cup | Chopped, optional garnish |
| Jalapeño Slices 🌶️ | 2 whole | Optional, for spicy kick |
| Salt 🧂 | ½ tsp | Kosher for seasoning |
The tortillas are the star—flour tortillas (not corn) create that perfect crunch. Grab a pack of Mission brand if you're at the grocery store, or any large flour tortillas from the bakery section. The mozzarella needs to be low-moisture—it melts better and doesn't make the tortillas soggy. Slice it paper-thin with a sharp knife or mandoline for even layers. I always double-check the cheese for any excess moisture by patting it dry with a paper towel before slicing. Freshly grated Parmesan adds that umami punch that takes it from good to restaurant-quality.
No flour tortillas? Corn tortillas work in a pinch, but they won't be as crispy. Short on mozzarella? Provolone or fontina add richness, though mozzarella is the classic choice. The butter matters here—unsalted so you control the seasoning, and melted just until liquid (not hot). For extra crunch, mix the flour with garlic powder and black pepper—trust me, it elevates everything. The optional toppings like basil and jalapeños can be swapped for anything you love—sun-dried tomatoes or crumbled bacon if you're feeling adventurous. Just keep the amounts light so they don't weigh down the tortillas.
Prep ahead for maximum crispiness—slice all your cheese and brush the tortillas with butter up to 2 hours before baking. Store any leftovers in an airtight container for 2 days—they reheat beautifully in a 350°F oven for 5 minutes. For parties, assemble them on a tray covered with foil, then bake when ready to serve. The secret to keeping them crispy? Bake in batches and serve immediately—these disappear faster than you can say "appetizer." Freeze any extras for up to 1 month, but they won't be quite as crispy when reheated.
Why You'll Love This Recipe
- Pantry Magic: I swear, this recipe uses stuff you already have—flour tortillas, cheese, butter—no fancy shopping required. The only prep is buttering tortillas and sprinkling cheese, then baking until golden. That’s it. No stress, no mess.
- Crispy-Creamy Magic: The thinly spread mozzarella turns into a gooey, stretchy blanket while the edges get that perfect golden crunch. Honestly, the first time I bit in, I nearly dropped the plate. That salty Parmesan kick seals the deal—simple, but ridiculously satisfying.
- Weeknight Hero: Between us, this is my go-to when I need something fast but still feels like a meal. Toss a few in the oven while you chop veggies for tacos, or serve them straight up with salsa. Even my picky-eating kid grabs seconds, and that’s saying something.
- Budget-Friendly Leftovers: A single batch makes enough for lunch the next day—no sad, wilted leftovers here. The cheese stretches far, and the tortillas are cheap. Plus, they reheat like a dream: microwave or oven, no difference. My wallet and my taste buds thank me.
Step-by-step instructions for baked cheese slices with crispy tortilla layers
Here's how to create golden, crispy tortilla shells with gooey, pull-apart cheese perfection.
Prepare the Tortilla Breading for Extra Crunch
In a shallow bowl, mix together the 0.25 cup all-purpose flour, 1 tsp garlic powder, 0.5 tsp salt, and 0.5 tsp ground black pepper. This seasoned flour will create the crispy crust that sets these cheese slices apart. I like to use a whisk to break up any flour clumps, ensuring an even coating on each tortilla.
Next, melt the 0.5 cup butter in a small saucepan over low heat until completely liquid but not browned. The butter should be smooth and silky—this is what will make your tortillas irresistibly crispy. Let it cool slightly before using, about 5 minutes, so it doesn't cook the tortillas too quickly in the oven.
Assemble the Cheese Layers with Perfect Technique
Preheat your oven to 375°F and grease a 9x13-inch baking dish with 1 tbsp olive oil. This size dish gives you enough room to create those signature pull-apart layers. Lay out all 8 large flour tortillas on a clean surface—you'll work with two at a time.
Place one tortilla in the prepared baking dish. Sprinkle half of the 16 oz mozzarella cheese (sliced paper-thin) evenly over the tortilla, leaving a ½-inch border around the edges. This prevents cheese from spilling over during baking. Top with another tortilla, then repeat the process with the remaining cheese and final tortilla. The layers should be tight but not compressed—just enough to create those signature pull-apart pockets.
Create the Crispy Crust and Melt the Cheese
Brush each tortilla layer generously with the melted butter, working quickly so the butter doesn't solidify. Then, press the seasoned flour mixture lightly over the top tortilla—just enough to coat it evenly. This creates the magical crispy crust that makes these cheese slices so special.
Bake for 25-30 minutes until the tortillas are deep golden brown and the cheese is fully melted and bubbly. You'll know it's ready when the edges are crispy and the cheese pulls away slightly from the tortillas when you gently shake the pan. If the top isn't brown enough, broil for 1-2 minutes at the end, watching closely to avoid burning.
Finish with Toppings and Serve Warm
Remove the baking dish from the oven and immediately sprinkle the 0.5 cup freshly grated parmesan cheese evenly over the top. The parmesan adds a salty, nutty contrast to the melty mozzarella. If using, place the 2 whole jalapeño slices on top for a spicy kick, or scatter the 0.25 cup chopped fresh basil leaves for freshness.
Let the cheese slices rest for 5 minutes before serving—this allows the cheese to set slightly and makes cutting easier. The result should be crispy tortilla edges that shatter with each bite, surrounded by gooey, stretchy cheese that pulls apart perfectly. Serve warm with marinara sauce for dipping, or enjoy as-is with a side salad for a complete meal.
Pro Tips For Making Baked Cheese Slices
- Preheat Like It’s 1987: I used to slide these into the oven without preheating, and they’d come out sad—chewy edges, undercooked centers. Crank your oven to 375°F (190°C) and let it scream hot for 10-15 minutes before baking. That extra time makes the butter melt evenly and the tortillas crisp up properly. (Yes, even if you’re impatient like me.)
- Grate the Parmesan Fresh: Pre-shredded Parmesan is a crime in this dish—it clumps and burns. Grab a box, but grate it yourself right before baking. A handful of freshly grated Parmesan (about ¼ cup) melts smoother and adds that nutty depth the pre-shredded version can’t match. (And skip the anti-caking stuff—it’s just filler.)
- Butter the Tortillas Inside Out: Slathering butter only on the outside leaves the cheese dry. Instead, fold each tortilla in half, spread 1 tablespoon of softened butter on the outer half, then unfold and press the cheese inside. The butter will seep in while baking, keeping the filling gooey. (This is the thing that actually changes the texture.)
- Don’t Overfill or Overcrowd: I learned this the hard way—stuffing tortillas to the brim makes them puff up like sad soufflés. Keep the cheese filling thin and even, about ¼ inch thick, and leave ½-inch borders empty. Also, bake one layer at a time on the middle rack; overcrowding steams them instead of browning. (Your future self will thank you.)
Storing and reheating your leftovers
Room-Temp Prep
Let your cheese slices cool completely to room temperature before storing—this prevents condensation that makes tortillas soggy. I spread them on a wire rack for 30 minutes after baking, which also helps them crisp up again when reheated.
Never stack them directly in the fridge; use parchment paper between layers to maintain crispness. 🌡️
Fridge Storage
Store baked cheese slices in an airtight container with a paper towel on top to absorb any moisture. They stay crispy for 3-4 days in the fridge, though the tortillas will lose some crunch after 2 days.
For maximum freshness, keep them in a single layer—don't overcrowd the container. I like using Rubbermaid Brilliance containers with snap-on lids for easy grab-and-go portions.
Oven Reheating
For the best texture, reheat slices in a 375°F oven for 5-7 minutes on a baking sheet lined with parchment. Cover loosely with foil for the first 3 minutes to melt the cheese, then uncover to crisp the tortillas.
A handheld infrared thermometer helps check internal temp—aim for 165°F at the cheese's center. Spritz with a tiny bit of water before reheating if they seem dry.
Air Fryer Method
My favorite quick method: preheat air fryer to 350°F and reheat slices in batches for 3-4 minutes, shaking halfway. The air fryer's rapid heat recaptures that crispy tortilla texture without drying out the cheese.
I use a Cuisinart Air Fryer with the basket lined with parchment—no sticking! For extra crunch, brush with a tiny bit of melted butter before reheating. 🔥
Freezer Storage
For long-term storage, freeze baked slices in a single layer on a tray for 1 hour before transferring to a freezer bag. They keep for up to 3 months, but texture changes after 2 months—the tortillas become more brittle.
To reheat from frozen, bake at 375°F for 8-10 minutes, adding 1 minute if they seem undercooked. Never microwave frozen slices—they'll turn rubbery.
Serving Warm
These taste best straight from the oven or reheated, so I always bake or reheat just before serving. For parties, keep them warm in a 200°F oven on a wire rack while you finish setting up.
The cheese should be gooey and stretchy, not dry. Garnish with fresh herbs or extra parmesan right before serving—it makes all the difference. 💫
Nutrition facts
Frequently asked questions
Can I use corn tortillas instead of flour tortillas?
Corn tortillas will work, but they won't be as crispy—flour tortillas have a higher gluten content that creates that satisfying crunch. If you must use corn, brush them with an extra 1 tbsp olive oil before baking and reduce the oven temperature to 350°F to prevent burning. The cheese will still melt beautifully, but the texture will be more tender than crispy.
What's the best cheese substitute if I don't have mozzarella?
Provolone or fontina are excellent substitutes—they melt beautifully and add rich flavor. For a sharper taste, try sharp cheddar, but it may not stretch as dramatically. Avoid pre-shredded cheese (it contains anti-caking agents that prevent proper melting). If you're feeling adventurous, mix half mozzarella with half Gruyère for a nutty, sophisticated twist.
Why did my cheese slices turn out soggy instead of crispy?
Soggy slices usually happen from excess moisture—either from wet cheese or condensation during storage. Always use low-moisture mozzarella and pat slices dry before baking. If storing leftovers, place them in an airtight container with a paper towel on top to absorb moisture. For extra crispiness, bake at 375°F for 25-30 minutes until golden brown, not just melted.
Can I make these ahead of time for a party?
Assemble the cheese slices up to 2 hours ahead and refrigerate uncovered on a wire rack. Bake just before serving—this prevents sogginess. For a crowd, bake in batches and keep warm in a 200°F oven on a wire rack. The cheese will stay gooey and the tortillas will crisp up beautifully when reheated. Pro tip: Cover with foil while warming to keep them moist.
What are the best dipping sauces for these cheese slices?
Classic marinara sauce is always a winner, but don't be afraid to get creative! Try spicy salsa, ranch or blue cheese dressing, or even honey mustard for a sweet contrast. For a gourmet touch, mix whipped cream cheese with smoked paprika and lime zest. The key is balancing flavors—salty, sweet, or spicy all pair well with the rich cheese.