
Salads
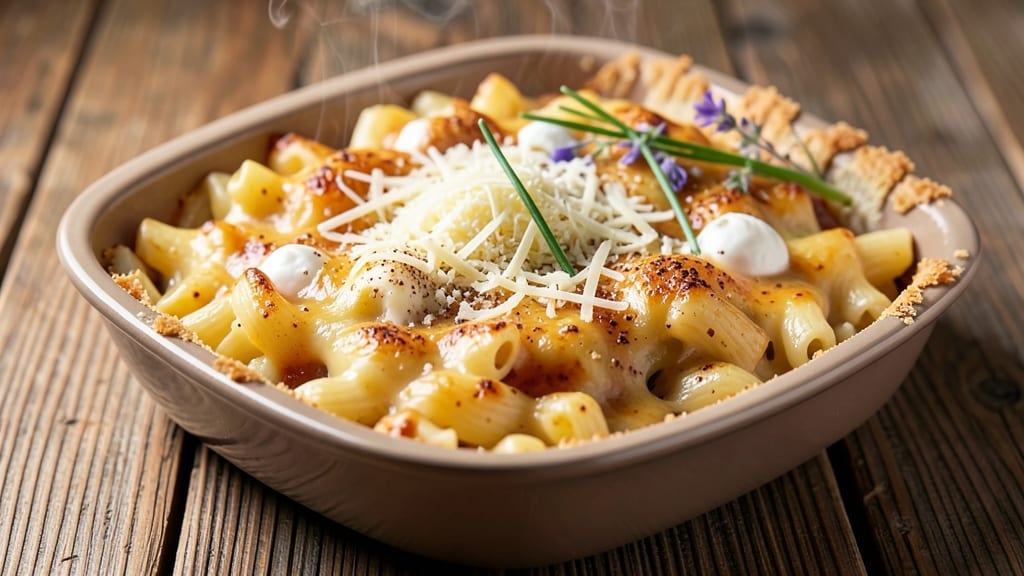
This authentic macaroni and cheese recipe delivers the perfect balance of Southern comfort—crispy golden breadcrumbs on top and a gooey, pull-apart cheese center that melts in every bite.
The secret lies in a rich, velvety cheese sauce made from a proper roux and a blend of sharp cheddar, Gruyère, and cream cheese for depth.
I’ve perfected this version over years of testing, ensuring the pasta stays al dente while the sauce clings perfectly, just like your favorite diner classic.
The foundation of great mac and cheese starts with a smooth, lump-free sauce—no shortcuts here. You’ll cook the pasta just shy of al dente, then toss it into the sauce while still hot, allowing the starch to create that signature creamy texture.
A buttery breadcrumb topping, toasted to golden perfection, adds the right amount of crunch without overpowering the rich cheese flavors. This isn’t just a side dish; it’s a restaurant-quality main course that’s foolproof for weeknights or holiday tables.
What sets this recipe apart is the authentic Southern technique—slow-cooked roux, layered cheeses, and a crispy topping that holds its shape. The result is a dish that’s rich, indulgent, and impossible to resist, with each forkful delivering that perfect pull of melted cheese.
Whether you’re feeding a family or craving a cozy solo meal, this mac and cheese will become your new go-to.
Ready to make it? The instructions walk you through every step, from making the roux to baking the crispy topping, so you’ll achieve restaurant-quality results at home. Serve with a simple green salad or crusty bread to soak up every last bit of that creamy goodness.
Ingredients for authentic macaroni and cheese
Six ingredients make the sauce. Three more bring the crispy magic.
| Ingredient | Amount | Notes |
|---|---|---|
| Elbow Macaroni 🍝 | 1 ½ lb | Medium or jumbo size preferred |
| Unsalted Butter 🧈 | ¾ cup | Cold, cut into small cubes |
| All-Purpose Flour 🌾 | ½ cup | For roux base |
| Sharp White Cheddar Cheese 🧀 | 2 cups | Shredded, block preferred |
| Gruyère Cheese 🧀 | 1 cup | Shredded, aged for nutty flavor |
| Cream Cheese 🧀 | 4 oz | Full-fat, softened |
| Whole Milk 🥛 | 2 cups | Warm for smooth sauce |
| Yellow Mustard 🟡 | 1 tbsp | For tangy depth |
| Salt 🧂 | 1 ½ tsp | Kosher or sea salt |
| Black Pepper 🌶️ | ½ tsp | Freshly ground preferred |
| Panko Breadcrumbs 🍞 | 1 cup | For crispy topping |
| Extra-Virgin Olive Oil 🫒 | 2 tbsp | For topping crispiness |
| Garlic Powder 🧄 | ½ tsp | Optional for extra flavor |
The cheeses are non-negotiable here. Gruyère brings that nutty depth, while sharp white cheddar delivers the tang you crave. I grab the block cheddar from the deli counter—pre-shredded gets clumpy and lacks flavor. For Gruyère, Whole Foods or specialty cheese shops have the best selection. The cream cheese is what makes this sauce velvety instead of grainy, so don't skip it. If you're feeling fancy, add a splash of white wine to the roux for extra richness—just reduce it down before adding the milk.
No Gruyère? Swiss cheese works in a pinch—it's milder but still adds creaminess. Running low on panko? Toasted breadcrumbs from a baguette give you that same crunch. The mustard is key for that classic tang, but if you're avoiding it, a splash of lemon juice does the trick. For the roux, low and slow is critical—rushing it burns the butter and makes the sauce bitter. If you're making this ahead, assemble everything except the topping and bake it straight from the fridge for best results.
This reheats like a dream—just cover with foil and bake at 350°F for 20 minutes. The topping stays crispy, and the cheese gets that perfect pull. Keeps in the fridge for 4-5 days, though honestly it's better the second day. For freezing, assemble fully and freeze before baking—bake straight from frozen, adding 10-15 minutes. Portion into individual servings so you can grab and go. Leftovers? Crispy topping makes great croutons for salads.
Why You'll Love This Recipe
- One-Pot Magic: I swear by this recipe because it’s actually one-pot—no saucepan mess, no straining, just toss everything in one deep skillet. The elbow macaroni cooks right in the rich, melty cheese sauce, and honestly? That’s where the magic happens.
- Cheese Love: Between the sharp white cheddar’s tang and Gruyère’s nutty depth, this sauce is dangerously addictive. I’ll be real: I’ve made it twice in one week, and the second time was for breakfast. No shame.
- Weeknight Hero: This is my go-to when I’m wiped but still need to feed the family. It’s ready in under 30 minutes, and the kids (even the picky ones) clear their plates. (Yes, even on a Tuesday night.)
- Budget-Friendly Luxury: Gruyère might sound fancy, but a little goes a long way—this recipe stretches to four servings without breaking the bank. Plus, leftovers reheat like a dream, so I’m never stuck with sad, dry pasta again.
Step-by-step instructions for Southern-style macaroni and cheese
Here's how to craft that perfect balance of crispy golden top and creamy, stretchy cheese pull.
Cook the Macaroni to Al Dente Perfection
Bring a large pot of water to a rolling boil and add 1½ pounds of elbow macaroni. I use jumbo size for that classic Southern texture—it holds up better to the rich cheese sauce. Cook until 1 minute before the package instructions call for al dente, about 11-12 minutes for jumbo elbows. You want it to finish cooking in the sauce, not become mushy.
Before draining, reserve 2 cups of pasta water. This starchy liquid is the secret weapon for creating a silky sauce. I keep a measuring cup nearby to catch it while I drain. Drain the pasta completely—no need to rinse, as the starch helps thicken the sauce. Toss the hot pasta with 1 tablespoon of yellow mustard right away to infuse that tangy depth throughout.
Make the Ultimate Cheese Sauce
In a large, heavy-bottomed pot, melt ¾ cup of cold cubed butter over medium-low heat. The cold cubes help create a smoother sauce by preventing the butter from burning. Once melted, whisk in ½ cup of all-purpose flour to form a roux. Cook for 2-3 minutes until the mixture turns a pale golden color—this is your flavor base.
Gradually whisk in 2 cups of warm whole milk, about ½ cup at a time, allowing each addition to fully incorporate before adding more. This slow addition prevents lumps and creates a velvety texture. Once all the milk is incorporated, stir in 2 cups of shredded sharp white cheddar, 1 cup of shredded Gruyère, and 4 ounces of softened cream cheese. Keep the heat at medium-low and stir constantly until the cheese melts completely and the sauce thickens to a creamy consistency, about 5-7 minutes.
Combine Pasta and Sauce for Maximum Cheese Pull
Add the drained, mustard-coated macaroni to the cheese sauce and stir gently to coat every strand. The pasta will soak up some of the sauce, so don't worry if it looks dry at first—it'll come together as it sits. Season with 1½ teaspoons of salt and ½ teaspoon of freshly ground black pepper. For an extra kick, add the ½ teaspoon of garlic powder now. Let the mixture sit off the heat for 5 minutes to allow the flavors to meld.
Here's where the magic happens: the sauce should be thick enough to cling to the pasta but still have a slight looseness to it. If it's too thick, stir in ¼ cup of reserved pasta water at a time until you achieve that perfect creamy consistency. You want it to coat the back of a spoon but still be pourable—this ensures that signature stretch when you pull a fork through it.
Create the Crispy Golden Topping
Preheat your broiler to high. Transfer the macaroni and cheese to a greased 9x13-inch baking dish, spreading it evenly. In a small bowl, mix together 1 cup of panko breadcrumbs, 2 tablespoons of extra-virgin olive oil, and a pinch of salt. Sprinkle this mixture evenly over the top of the macaroni and cheese, pressing down gently with the back of a spoon to ensure it sticks.
Place the baking dish on a baking sheet (to catch any potential spills) and broil for 3-5 minutes, watching closely. You want the top to turn a deep golden brown with crispy spots—this is your signal to remove it immediately. The broiler can work fast, so keep an eye on it. If any spots start to brown too quickly, move the dish around for even browning.
Rest and Serve for Maximum Enjoyment
Let the macaroni and cheese rest for 10 minutes before serving. This resting period allows the sauce to fully set and the flavors to develop even more. The crispy topping will soften slightly, but it'll still hold its texture beautifully. Serve immediately with a side of buttery green beans or a simple garden salad to balance the richness.
When you cut into it, you should see that golden, crispy crust on top and a creamy, stretchy cheese pull throughout. Each bite should deliver that perfect combination of textures and flavors—creamy, cheesy, and just a hint of tang from the mustard. This is the macaroni and cheese your taste buds have been craving!
Pro Tips For Making Authentic Macaroni And Cheese
- Melt Cheese Slowly: I learned this the hard way—dumping shredded cheddar and Gruyère into hot butter makes it clump like a science experiment gone wrong. Instead, melt the butter first, then whisk in the flour to form a roux, and gradually add the cheese while stirring constantly. The heat should be medium-low—high heat turns cheese into glue.
- Shred Cheese Fresh: Pre-shredded cheese is coated with anti-caking agents that make your mac and cheese taste like it’s been dusted with chalk. Grate your own sharp white cheddar and Gruyère on the large holes of a box grater—it melts smoother and tastes richer. (Yes, it takes 2 minutes extra, but your future self will notice.)
- Toast the Pasta: Skip the boiling water bath for al dente pasta—it makes the sauce watery. Instead, cook the elbows in salted water until just 1 minute shy of package time, then drain and toss them in a dry skillet with a pat of butter for 30 seconds. The toasted edges hold the cheese sauce like a dream.
- Stir Like You Mean It: The first time I made this, I stirred the roux half-heartedly and ended up with a lumpy, grainy mess. Now I use a wooden spoon and stir aggressively for 2-3 minutes after the cheese melts—this breaks up any clumps and creates that silky, velvety texture. (Your arm might protest, but the payoff is worth it.)
Health benefits of these flavors
Comfort Food Nutrition
Macaroni and cheese might seem indulgent, but it actually packs a surprisingly balanced nutritional profile. The whole milk and cream cheese provide high-quality protein (about 18 grams per serving) and calcium for strong bones.
The Gruyère and sharp cheddar contribute vitamin A and zinc, which support immune function and skin health. Even the panko topping adds a small dose of fiber from whole grains. 💪
Creamy Texture Benefits
The rich cheese sauce isn't just delicious—it delivers healthy fats from the butter and cheese that help your body absorb fat-soluble vitamins like A, D, and E. The roux-based sauce creates a smooth texture without artificial thickeners, making it easier to digest than processed alternatives.
Plus, the mustard adds a touch of vitamin C and antioxidants that balance the dish's richness.
Energy-Boosting Carbs
Elbow macaroni provides complex carbohydrates for sustained energy, with about 45 grams per serving. These carbs fuel your brain and muscles, making this dish perfect for post-workout meals or cozy family dinners.
The al dente cooking ensures better digestion than overcooked pasta, while the cheese sauce adds satisfying fat to slow down digestion and keep you full longer.
Customizable for Dietary Needs
While this recipe is rich, you can easily adapt it to fit dietary preferences. Swap whole milk for unsweetened almond milk to reduce saturated fat, or use low-fat cheese without sacrificing flavor.
For extra protein, stir in cooked chicken or turkey before baking. The panko topping can be made gluten-free with certified GF breadcrumbs, making this dish surprisingly versatile. ✨
Nutrition facts
Frequently asked questions
Can I use pre-shredded cheese for this recipe?
While it's tempting, I strongly recommend using block cheese that you shred yourself. Pre-shredded cheese contains anti-caking agents that make the sauce grainy. For the best texture, grate sharp white cheddar and Gruyère fresh using a box grater or food processor. The extra effort ensures that velvety, restaurant-quality pull you're craving!
How do I fix a sauce that's too thick or too thin?
For a thick sauce that needs loosening, stir in ¼ cup of reserved pasta water at a time until you reach that perfect creamy consistency. If it's too thin, remove from heat and let it sit for 5 minutes—it often thickens as it cools. For emergency fixes, mix 1 teaspoon of cornstarch with 1 tablespoon of cold water and whisk it in slowly. The key is patience and small adjustments!
Can I make this ahead of time for a party?
Assemble everything except the topping up to 24 hours ahead and refrigerate. When ready to serve, simply add the breadcrumb mixture and broil for 3-5 minutes until golden. The flavors actually improve overnight as the cheese melds. For large gatherings, consider making two batches—the crowd will disappear it faster than you can say "cheesy goodness!"
What's the secret to the perfect crispy topping?
The magic lies in three things: panko breadcrumbs (they stay crispy), olive oil (for browning), and pressing gently to help it stick. Broil on high heat for just 3-5 minutes—watch like a hawk! The moment it turns golden brown, remove it immediately. If you prefer extra crunch, sprinkle with paprika or garlic powder before broiling.
Can I make this without a broiler?
Yes! If you don't have a broiler, bake the assembled dish at 425°F for 15-20 minutes until the topping is golden brown. For extra crispiness, broil for 1-2 minutes at the very end. The oven method works well for larger batches too. Just keep an eye on it—the topping can go from perfect to burnt in seconds!